Classic Frosting Recipe: Pastry Chef’s Guide to Old Fashioned Powdered Sugar Frosting
The art of creating the perfect frosting is a timeless skill that separates amateur bakers from true pastry professionals. Old fashioned powdered sugar frosting represents the foundation of classic American baking, a versatile canvas that has graced everything from simple sheet cakes to elaborate wedding confections for generations. This elegant, silky frosting delivers the nostalgic sweetness and smooth texture that defines traditional desserts, making it an essential technique every home baker should master.
Much like understanding your personal style creates a cohesive wardrobe, mastering the fundamentals of classic frosting creates a foundation for all your baking endeavors. Whether you’re decorating a birthday cake, topping cupcakes, or preparing desserts for a special occasion, this timeless recipe offers endless possibilities for customization and creative expression. The beauty of old fashioned powdered sugar frosting lies in its simplicity—just a few quality ingredients transform into something truly magical.
Understanding the Fundamentals of Classic Frosting
Old fashioned powdered sugar frosting, also known as American buttercream or confectioner’s frosting, represents the most accessible and beloved frosting style in traditional American baking. This frosting achieves its signature characteristics through the careful balance of butter, powdered sugar, and liquid—typically milk or cream. The result is a frosting that’s neither too thick nor too thin, offering the perfect consistency for spreading, piping, and decorating.
The history of this frosting style traces back to early American baking traditions, when home cooks developed techniques to create smooth, spreadable frostings using readily available pantry staples. Unlike more complex French or Italian meringue-based frostings, this straightforward approach requires minimal technical skill while delivering professional-quality results. The frosting’s appeal lies in its pure, uncomplicated flavor profile that complements virtually any cake flavor without overwhelming the palate.
Professional pastry chefs value this classic frosting for its reliability and versatility. It maintains structural integrity for layered cakes, provides an ideal base for decorative piping, and develops a subtle crust that helps seal in moisture. Understanding the science behind each ingredient helps you achieve consistent, beautiful results every single time you frost a cake.
Essential Ingredients for Perfect Results
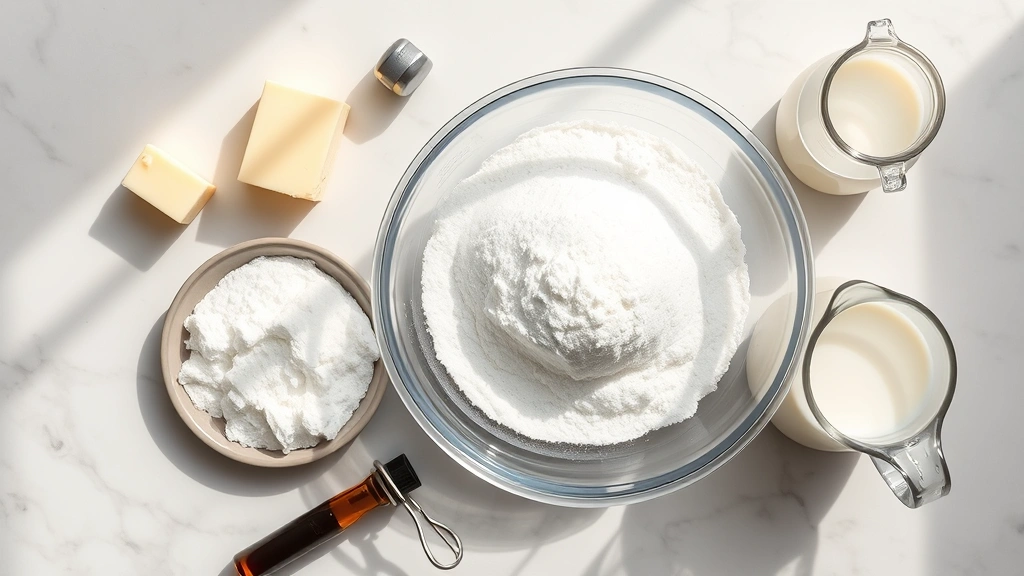
Creating exceptional old fashioned powdered sugar frosting begins with selecting high-quality ingredients. The foundation starts with unsalted butter—the primary flavor component that delivers richness and smoothness. Using room temperature butter is absolutely crucial, as cold butter creates lumpy frosting that refuses to whip properly, while overly warm butter produces a greasy, separated mixture.
Powdered sugar, also called confectioner’s sugar, serves as both sweetener and thickening agent. This finely ground sugar dissolves quickly into the butter, creating that signature silky texture. Sifting your powdered sugar before mixing eliminates lumps and ensures a smooth, lump-free frosting. Many professional bakers sift their powdered sugar twice to guarantee the finest possible texture.
The liquid component—typically whole milk, heavy cream, or a combination of both—adjusts the frosting’s consistency and contributes subtle flavor nuances. Some bakers prefer using traditional recipes that call for buttermilk, which adds a slight tang that beautifully complements vanilla cake. Vanilla extract rounds out the flavor profile with aromatic warmth, while a pinch of salt enhances sweetness and balances flavors.
- Unsalted butter: 1 pound (4 sticks), softened to room temperature
- Powdered sugar: 2 pounds, sifted twice
- Whole milk or heavy cream: 4-6 tablespoons
- Vanilla extract: 2 teaspoons pure vanilla
- Fine sea salt: ¼ teaspoon
The ratios provided above create approximately 4 cups of frosting, sufficient for a standard two-layer 8-inch cake or approximately 24 cupcakes. Adjusting quantities is simple—maintain the same proportions while scaling up or down based on your project requirements.
Step-by-Step Preparation Method
Begin by ensuring all ingredients are at room temperature—this seemingly minor detail makes an enormous difference in your final result. Remove your butter from the refrigerator approximately 30-45 minutes before you plan to mix your frosting. The butter should yield slightly when pressed with your finger but maintain its shape. This optimal temperature allows the butter to incorporate air more efficiently, creating a lighter, fluffier frosting.
Place your softened butter in a large mixing bowl and beat on medium speed for approximately 2-3 minutes. This initial beating incorporates air into the butter, creating a pale, fluffy base that will accept the powdered sugar more easily. You’ll notice the butter transforming from a dense, compact mass into something lighter and creamier—this is exactly what you want to see.
Gradually add your sifted powdered sugar, approximately one cup at a time, mixing on low speed between additions. This gradual approach prevents powdered sugar from flying everywhere while ensuring each addition incorporates thoroughly before adding more. After incorporating all the powdered sugar, increase your mixer speed to medium and beat for approximately one minute.
Add your liquid one tablespoon at a time, beating on low speed between additions. Start with four tablespoons and assess the consistency—you want a frosting that’s spreadable but holds its shape. If your frosting seems too thick, add additional liquid one teaspoon at a time until you achieve the desired consistency. Finally, add your vanilla extract and salt, mixing on low speed until fully incorporated.
The entire mixing process typically requires 5-7 minutes from start to finish. Your finished frosting should appear smooth, creamy, and light in color. If you notice any lumps or graininess, continue beating on medium speed for an additional 1-2 minutes until the texture becomes completely smooth.
Advanced Techniques and Professional Tips
Professional pastry chefs employ several advanced techniques to elevate their frosting game beyond basic preparation. One such technique involves using a combination of butter and shortening—typically 3 parts butter to 1 part vegetable shortening. This ratio creates a frosting with superior stability for piping intricate designs, as the shortening raises the frosting’s melting point, preventing it from drooping in warm environments. However, some purists argue this diminishes the frosting’s authentic flavor, so experiment to find your personal preference.
Temperature control represents another critical professional consideration. Maintaining your frosting at approximately 65-70°F (18-21°C) creates optimal consistency for decorating. If your kitchen is warm, refrigerate your frosting for 15-20 minutes before piping. Conversely, if your frosting becomes too firm, let it sit at room temperature or gently warm it over a double boiler, stirring constantly, until it reaches the proper consistency.
The crumb coat technique, beloved by professional decorators, involves applying a thin initial layer of frosting to seal in crumbs before applying the final frosting layer. Chill this crumb coat for 15-20 minutes before applying your final frosting layer, which ensures a clean, professional appearance without visible cake crumbs marring your design.
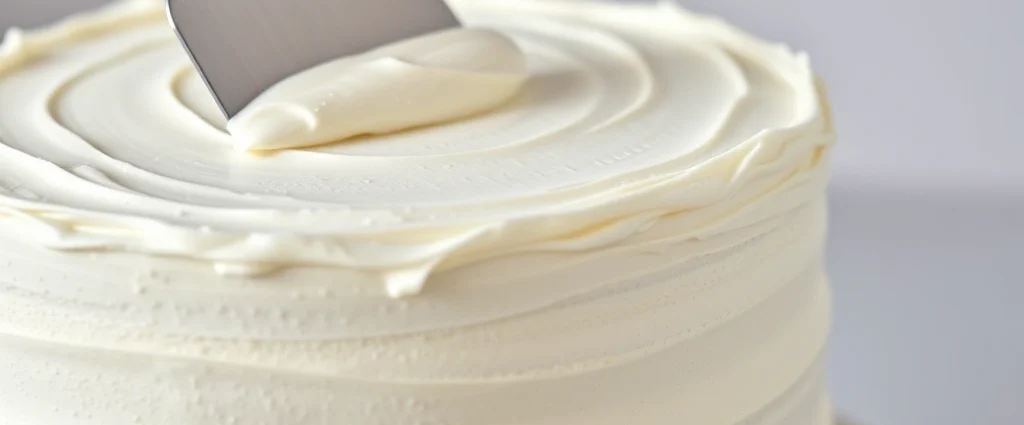
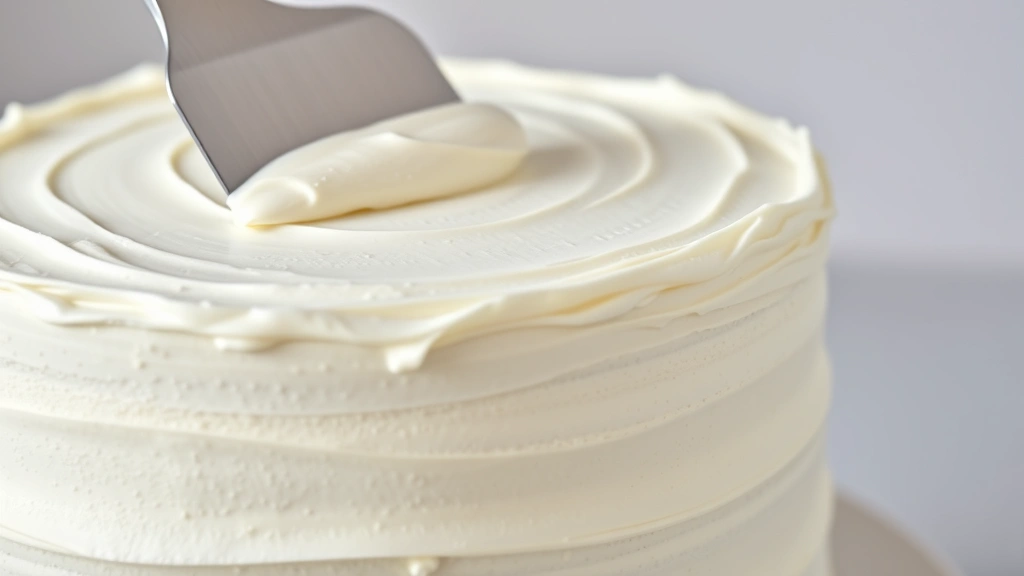
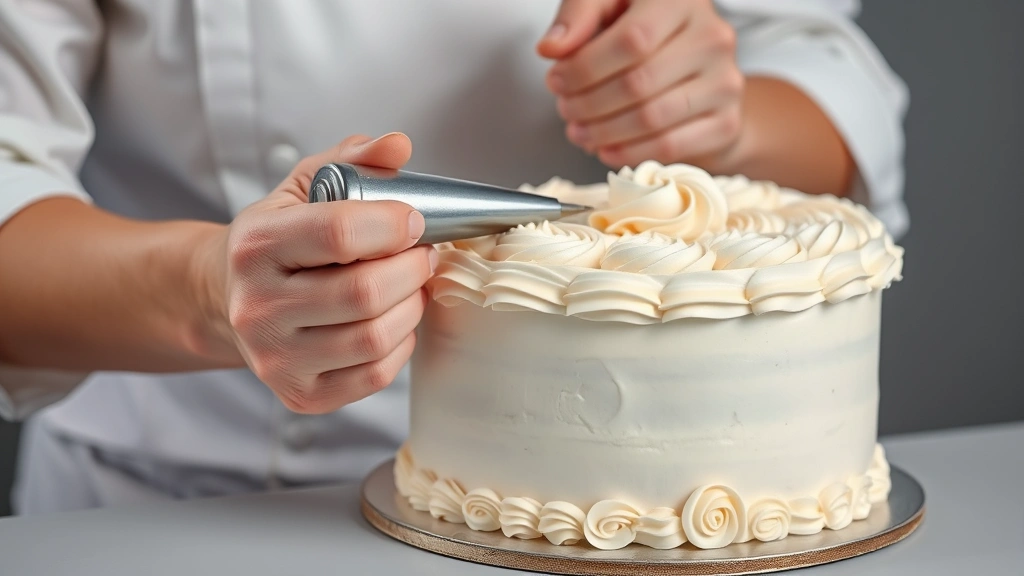
Using an offset spatula rather than a regular knife transforms your frosting application. These specially designed tools feature a thin, angled blade that glides smoothly across cake surfaces, creating even layers and beautiful finishes. Warming your spatula under hot water and drying it thoroughly before each stroke helps achieve glass-smooth finishes that rival professional bakery cakes.
Flavor Variations and Creative Customizations
While classic vanilla represents the traditional choice, old fashioned powdered sugar frosting welcomes countless flavor variations. Like exploring fashion trends through different eras, you can journey through flavor possibilities by substituting or adding complementary ingredients to your base frosting recipe.
Chocolate Frosting: Add 3-4 tablespoons of unsweetened cocoa powder to your finished frosting, sifting it first to eliminate lumps. Add an additional tablespoon of milk if the cocoa powder makes your frosting too thick. This variation perfectly complements chocolate or vanilla cakes.
Lemon Frosting: Replace the milk with fresh lemon juice and add 1-2 tablespoons of lemon zest to your finished frosting. This bright, refreshing variation pairs beautifully with yellow cake or white cake, offering a sophisticated flavor profile.
Cream Cheese Frosting: Reduce the butter to ½ pound and add 8 ounces of softened cream cheese. Beat the cream cheese and butter together before adding powdered sugar. This tangy variation elevates carrot cake and red velvet cake to new heights.
Coffee Frosting: Dissolve 1-2 tablespoons of instant espresso powder in your milk before adding it to the frosting. This sophisticated variation complements chocolate cakes and provides an excellent filling for mocha-flavored desserts.
Almond Frosting: Replace the vanilla extract with ½ teaspoon of almond extract and add ¼ teaspoon of pure almond oil. This delicate variation pairs beautifully with white cake and complements fruit-based desserts.
Beyond these classic variations, consider adding extracts like peppermint, coconut, or maple. You might incorporate edible flowers like candied violets or rose petals for elegant presentations. Some bakers add a tablespoon of liqueur—such as Grand Marnier, Kahlúa, or Bailey’s Irish Cream—for sophisticated adult-oriented desserts. The possibilities truly are endless, limited only by your imagination.
Storage and Shelf Life Guidelines
Proper storage ensures your frosting maintains optimal quality and safety. Refrigerate frosted cakes in an airtight container for up to five days. The frosting’s butter content actually improves cake moisture over time, making day-two cakes often superior to freshly frosted versions. Remove frosted cakes from the refrigerator approximately 30 minutes before serving to allow the frosting to soften slightly and flavors to come forward.
Unfrosted cakes can be refrigerated for up to one week when properly wrapped in plastic wrap and stored in an airtight container. Freezing unfrosted cakes extends their life to approximately three months—simply wrap completely in plastic wrap and aluminum foil before freezing. Allow frozen cakes to thaw at room temperature for several hours before frosting.
Prepared frosting itself keeps refrigerated for up to two weeks in an airtight container. To revive refrigerated frosting, allow it to reach room temperature and beat on medium speed for 1-2 minutes until it returns to proper consistency. Frozen frosting maintains quality for up to three months—thaw in the refrigerator overnight before using.
Always use clean utensils when scooping frosting from containers to prevent contamination. If you notice any discoloration, off-smells, or unusual texture changes, discard the frosting immediately. While butter-based frostings are quite stable, using fresh, high-quality ingredients and maintaining proper storage temperatures prevents any potential issues.
Understanding these storage principles helps you prepare ahead for special occasions, much like planning your wardrobe in advance ensures you’re always prepared with perfect style. You can frost cakes days in advance, transforming your baking schedule and reducing last-minute stress.
FAQ
Why is my frosting grainy or lumpy?
Grainy frosting typically results from either insufficiently sifted powdered sugar, butter that was too cold when mixed, or overmixing after adding liquid. Always sift your powdered sugar at least twice, ensure your butter is truly softened, and mix only until ingredients are incorporated—excessive mixing can actually break down the frosting’s structure.
Can I make this frosting without butter?
Traditional old fashioned powdered sugar frosting requires butter for authentic flavor and texture. However, if you have dietary restrictions, you might try using high-quality vegan butter as a substitute, though the flavor profile will differ slightly from the classic version.
How do I fix frosting that’s too thick?
Add liquid one teaspoon at a time, beating on low speed between additions, until you achieve the desired consistency. Work gradually to avoid making your frosting too thin, which is more difficult to correct.
How do I fix frosting that’s too thin?
Gradually add sifted powdered sugar one tablespoon at a time, beating on low speed between additions. This method allows you to thicken your frosting without creating lumps or affecting the overall flavor balance.
What’s the difference between this frosting and buttercream?
American buttercream (old fashioned powdered sugar frosting) uses powdered sugar as its primary sweetener, creating a smooth, spreadable consistency. Swiss or Italian buttercream involve cooking egg whites with sugar before beating with butter, creating silkier, more stable frostings that require more technical skill.
Can I color this frosting?
Absolutely! Gel food coloring works best, as liquid food coloring can thin your frosting. Add gel coloring one drop at a time, beating thoroughly between additions, until you achieve your desired shade. Remember that colors intensify slightly as frosting sits, so err toward lighter colors initially.
How far in advance can I frost a cake?
You can frost a cake up to five days in advance if properly stored in an airtight container in the refrigerator. The frosting actually helps seal in cake moisture, often making older frosted cakes superior to freshly decorated ones.