How to Cook Old-Fashioned Oats: Chef Tips for Perfect Breakfast Every Time
Old-fashioned oats have made a remarkable comeback in modern kitchens, becoming a staple for health-conscious breakfast enthusiasts and culinary professionals alike. Unlike instant oats, these rolled oats retain their texture and nutritional integrity, offering a satisfying breakfast experience that goes beyond mere convenience. Whether you’re starting your day with intention or seeking comfort in a warm bowl, mastering the art of cooking old-fashioned oats transforms this humble ingredient into a canvas for culinary creativity.
The beauty of old-fashioned oats lies in their versatility and nutritional density. Rich in fiber, protein, and essential minerals, they provide sustained energy throughout your morning while keeping you satisfied until lunch. Professional chefs and nutritionists consistently recommend this ingredient for its ability to absorb flavors while maintaining a pleasant chewy texture. This comprehensive guide reveals insider techniques, timing secrets, and flavor combinations that elevate your breakfast routine from ordinary to extraordinary.

Understanding Old-Fashioned Oats vs. Other Varieties
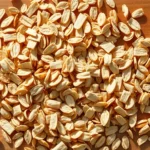
Old-fashioned oats, also called rolled oats, represent a middle ground between steel-cut oats and instant varieties. During processing, oat groats are steamed and then rolled flat, creating flakes that cook faster than steel-cut versions while maintaining superior texture compared to instant oats. This processing method preserves the oat’s structural integrity, allowing each bite to deliver a satisfying chewiness that instant oats simply cannot replicate.
The distinction matters significantly when cooking. Steel-cut oats require 25-30 minutes of cooking time and produce a creamier, porridge-like consistency. Instant oats, conversely, dissolve almost immediately into mush within 2-3 minutes. Old-fashioned oats strike the perfect balance, requiring just 5-7 minutes of cooking while maintaining their individual grain structure. This timing makes them ideal for both quick weekday breakfasts and leisurely weekend mornings when you want to savor your meal.
Understanding these differences helps you make informed choices about your breakfast preparation. If you’re seeking restaurant-quality results at home, old-fashioned oats provide the best foundation for developing complex flavors and pleasing textures. The StyleLoom Daily Blog celebrates the importance of quality ingredients in everyday living, much like selecting the right oat variety for your culinary needs.

Essential Equipment and Ingredients You’ll Need
Creating perfect old-fashioned oats requires minimal equipment, though certain tools enhance the cooking experience. A heavy-bottomed saucepan distributes heat evenly, preventing scorching on the bottom while ensuring uniform cooking throughout. Medium saucepans work best, typically 2-3 quart capacity, allowing adequate space for oats to expand without boiling over.
Beyond the pan, you’ll benefit from a wooden spoon for stirring—metal utensils can damage non-stick surfaces and create unnecessary noise. A measuring cup ensures consistency across batches, while a timer prevents overcooking. Many professional chefs recommend keeping a small whisk nearby for incorporating ingredients smoothly and preventing lumps.
Ingredient-wise, the foundation remains simple: old-fashioned oats, liquid (water or milk), and salt. However, elevating your breakfast begins with thoughtful ingredient selection. Whole milk creates creamier results than water, while oat milk provides a plant-based alternative without sacrificing richness. Filtered water ensures clean flavor, and quality sea salt enhances natural oat flavors without adding harshness. Consider this foundation as you would select pieces for your wardrobe—intentional choices create superior outcomes.
The Perfect Stovetop Method: Step-by-Step Instructions
Master chefs across the culinary world employ consistent techniques for stovetop oat preparation. Begin by measuring your desired portion: one cup of old-fashioned oats serves two people generously. Pour the oats directly into your saucepan without pre-rinsing, as the oat flour that clings to each grain contributes valuable creaminess and flavor.
Step One: Add Your Liquid
Add two cups of liquid per one cup of oats. This ratio produces creamy yet textured results. If you prefer thinner consistency, increase liquid to 2.5 cups; for thicker porridge, reduce to 1.75 cups. Pour liquid slowly while stirring to distribute oats evenly and prevent clumping. This methodical approach mirrors the intentionality recommended in how to find your personal style—deliberate choices yield better results.
Step Two: Bring to a Boil
Set your burner to medium-high heat. Allow the mixture to come to a gentle boil, stirring occasionally to prevent sticking. This initial heating phase typically requires 3-4 minutes. You’ll notice the oats beginning to absorb liquid and soften slightly. Watch for the first bubbles breaking through the surface, indicating readiness for the next phase.
Step Three: Reduce Heat and Simmer
Once boiling, reduce heat to medium or medium-low, maintaining a gentle simmer. This slower cooking allows oats to fully hydrate and develop their characteristic creamy texture. Stir frequently—approximately every minute—to ensure even cooking and prevent the bottom layer from burning. Professional chefs emphasize this step as crucial for achieving consistent results.
Step Four: Cook Until Tender
Continue simmering for 5-7 minutes, tasting periodically to assess doneness. Oats should be tender but retain slight firmness between your teeth. Overcooked oats become mushy and lose their appealing texture, so timing precision matters. The cooking duration varies slightly based on your stovetop’s heat intensity and oat freshness.
Step Five: Rest and Serve
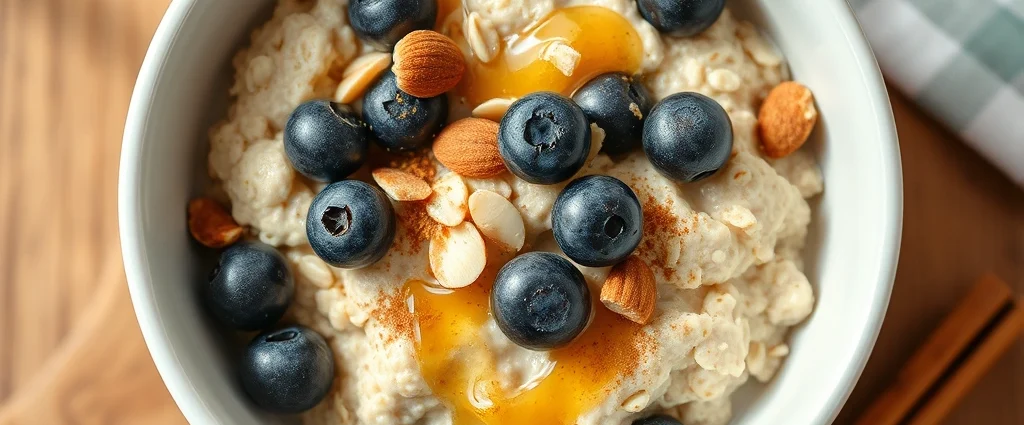
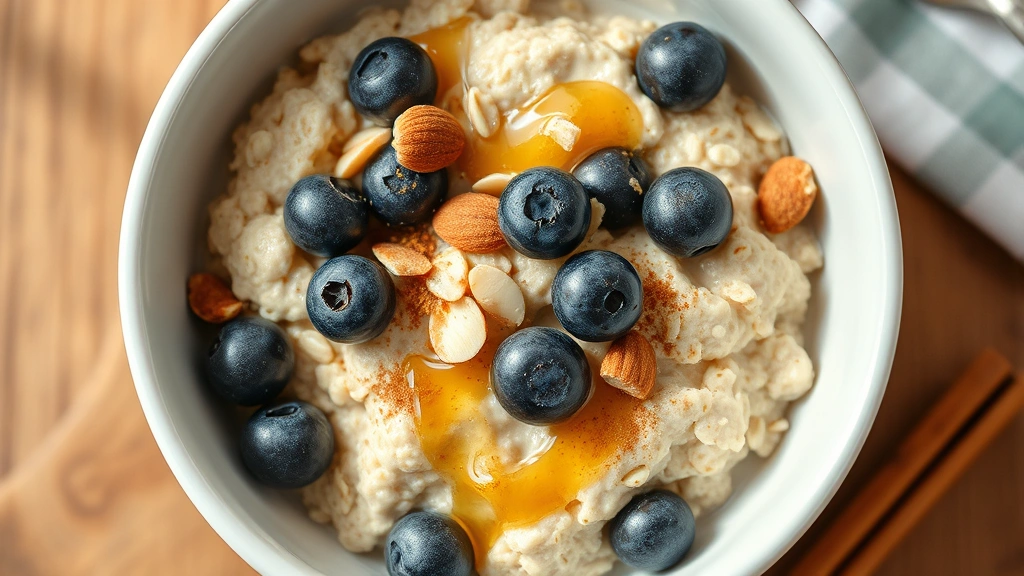
Remove from heat and let rest for one minute. This resting period allows residual heat to finish cooking while oats continue absorbing liquid, achieving optimal creaminess. If your oats seem too thick, add a splash of warm milk and stir gently. Pour into bowls immediately and top with your chosen accompaniments.
Timing and Temperature Control Secrets
Professional chefs understand that temperature control separates mediocre oats from exceptional ones. The initial high heat brings liquid to boiling point quickly, activating the cooking process. However, maintaining medium heat during the simmering phase proves absolutely critical. Too-high heat causes rapid liquid evaporation, resulting in burnt bottoms and unevenly cooked oats. Too-low heat extends cooking time unnecessarily, potentially producing gummy texture.
Experienced cooks develop intuitive timing sense through repeated practice, but beginners benefit from setting a timer for exactly five minutes once heat reduces to medium. At the five-minute mark, taste a small spoonful carefully. If oats still feel distinctly hard, continue cooking for one more minute. This incremental approach prevents overcooking while ensuring complete tenderness.
The ambient temperature of your kitchen affects cooking times slightly. During winter months, cold cookware requires slightly longer heating; summer kitchens may cook faster. Quality cookware with thick, even-bottomed construction maintains consistent temperatures, eliminating hot spots that cause uneven cooking. This attention to detail parallels the precision required when pursuing fashion design degree programs, where technical skill combines with creative vision.
Creative Flavor Combinations and Toppings
The true artistry of oat preparation emerges through thoughtful flavor combinations. Rather than adding sugar directly to the cooking liquid—which can harden oats and prevent proper hydration—incorporate sweetness through toppings and mix-ins after cooking. This approach provides greater control over final sweetness levels and allows diners to customize their bowls.
Classic Combinations
Honey, cinnamon, and sliced bananas create a timeless pairing that appeals to all ages. Brown sugar with nutmeg and vanilla extract evokes nostalgic comfort. Maple syrup combined with toasted pecans and dried cranberries offers sophisticated elegance suitable for weekend entertaining.
Seasonal Variations
Spring calls for fresh berries and light citrus zests. Summer invites tropical additions: fresh mango, shredded coconut, and lime juice. Autumn celebrates warm spices: cardamom, cloves, and pumpkin puree. Winter embraces rich chocolate, espresso powder, and warming ginger. This seasonal approach keeps your breakfast routine fresh and exciting throughout the year.
Protein Boosters
Greek yogurt stirred into finished oats adds creaminess and protein without requiring additional cooking. Nut butters—almond, peanut, or cashew—swirl beautifully into warm oats, creating luxurious texture. Seeds including chia, flax, and pumpkin contribute crunch, nutrition, and visual appeal. Protein powder mixes smoothly when oats are still warm, providing additional nutritional density.
Textural Elements
Toasted nuts provide satisfying crunch and healthy fats. Granola sprinkled on top adds complexity and prevents the bowl from becoming monotonously smooth. Coconut flakes, both toasted and raw, offer tropical notes. Fresh fruit maintains brightness and acidity, cutting through the oats’ richness beautifully.
Advanced Cooking Techniques from Professional Chefs
Restaurant-quality oat preparation incorporates several professional techniques that elevate home cooking. Many chefs bloom their oats by briefly toasting them in a dry pan before adding liquid. This 2-3 minute toasting process develops deeper, more complex flavors reminiscent of toasted grains. The process requires constant stirring to prevent burning but yields noticeably superior results.
Another advanced technique involves using stock instead of water. Vegetable, chicken, or bone broth adds savory depth and nutritional complexity. This approach works beautifully when you plan savory oat bowls topped with roasted vegetables, poached eggs, and fresh herbs. The old fashioned meatloaf recipe philosophy of building layers of flavor applies equally to oat preparation.
Professional chefs also employ the double-liquid technique: starting with water for cooking, then finishing with milk or cream added just before serving. This method creates superior creaminess without requiring full-milk cooking, which can scorch more easily. Simply stir in ¼ to ½ cup of cold milk or cream at the end, allowing residual heat to warm it through.
Emulsification offers another restaurant technique: whisking a small amount of butter into finished oats creates a silky, luxurious mouthfeel. This addition should occur just before serving, with vigorous whisking incorporating the butter thoroughly. The result tastes indulgent while requiring minimal additional fat.
Overnight Oats: The Make-Ahead Alternative
For busy mornings, overnight oats provide convenient alternatives requiring zero cooking. This method capitalizes on oats’ ability to absorb liquid through extended soaking rather than heat application. The result differs from stovetop oats—creamier and more pudding-like—but offers undeniable convenience for grab-and-go breakfasts.
Prepare overnight oats by combining one cup old-fashioned oats with one cup milk and one cup yogurt in a mason jar. Add your desired flavorings: vanilla extract, cinnamon, honey, or maple syrup. Seal the jar and refrigerate overnight, or up to five days. In the morning, stir gently, adding additional milk if desired for your preferred consistency. Enjoy cold or transfer to a microwave-safe bowl and heat for 60-90 seconds.
The overnight method suits those prioritizing convenience without sacrificing quality. Many professionals prepare jars on Sunday, enjoying grab-and-go breakfasts throughout the week. This meal-prep approach aligns with the 90s fashion aesthetic of intentional, curated choices applied to modern living.
Troubleshooting Common Cooking Mistakes
Oats Turning Out Mushy
Mushiness results from overcooking or using too much liquid. Reduce cooking time by one minute and verify your liquid ratio. Old-fashioned oats require exactly two cups liquid per one cup oats for optimal texture. If you’ve already overcooked, don’t discard—repurpose into oat cookies or granola bars.
Oats Remaining Hard and Crunchy
Insufficient cooking or heat that’s too low causes this issue. Ensure your burner reaches medium heat and maintain a steady simmer throughout cooking. Verify you’re using old-fashioned oats rather than steel-cut varieties, which require longer cooking. Allow additional cooking time if needed, tasting every 30 seconds until tenderness reaches your preference.
Burnt Bottom Layer
Burning indicates either excessive heat or insufficient stirring. Reduce burner temperature and stir more frequently—ideally every 30-45 seconds. Using a heavy-bottomed pan helps distribute heat evenly, preventing hot spots. If burning occurs, transfer remaining oats immediately to a clean pan to prevent further charring.
Oats Boiling Over
Vigorous boiling causes overflow. Reduce heat to medium or medium-low once liquid reaches boiling point. A wooden spoon placed across the pan’s rim helps prevent bubbling over. If overflow begins, remove pan from heat briefly and stir gently to break the bubble foam.
Oats Tasting Bland
Salt enhances oat flavor significantly—add ¼ teaspoon per cup of oats. Quality milk instead of water contributes natural sweetness and richness. Avoid adding sugar to cooking liquid; instead, incorporate sweetness through toppings where it creates greater impact. Consider toasting oats briefly before cooking to develop deeper, more complex flavors.
Frequently Asked Questions
How much old-fashioned oats should I cook per person?
One cup of uncooked old-fashioned oats serves two people generously. For single servings, use ½ cup oats with one cup liquid. This ratio remains consistent and produces excellent results across all portion sizes.
Can I cook old-fashioned oats in the microwave?
Yes, microwave cooking works well for convenience. Combine one cup oats with two cups liquid in a microwave-safe bowl. Microwave uncovered on high power for 2.5 minutes, stir, then continue microwaving for 1.5-2 minutes until liquid absorbs. Let rest one minute before serving. Results differ slightly from stovetop—slightly less creamy—but provide excellent convenience.
Should I rinse old-fashioned oats before cooking?
No, rinsing removes beneficial oat flour that contributes creaminess and flavor. Simply measure and add directly to your pan. The oat flour remaining on each grain enhances your finished dish.
How long do cooked oats last in the refrigerator?
Properly stored cooked oats keep for 3-5 days in airtight containers. Reheat with a splash of milk or water, either stovetop or microwave. Cold oats can also be enjoyed straight from the refrigerator or warmed gently.
Can I prepare oats without dairy?
Absolutely. Water, plant-based milks (oat, almond, coconut, soy), or non-dairy yogurt work beautifully. Vegetable or bone broth provides savory alternatives. Each liquid creates slightly different flavor profiles—experiment to discover your preference.
What’s the difference between old-fashioned and rolled oats?
These terms describe the same product. “Old-fashioned” and “rolled” are used interchangeably, both referring to oat groats steamed and flattened into flakes.
Are old-fashioned oats gluten-free?
Oats themselves contain no gluten, but cross-contamination during processing can occur. If you require gluten-free products, purchase oats specifically labeled certified gluten-free to ensure safe processing practices.
Can I add frozen berries to cooking oats?
Yes, frozen berries add beautifully during the last minute of cooking. They thaw quickly in the residual heat without overcooking. Add fresh berries after cooking to preserve their texture and brightness.