Old fashioned pancakes represent more than just a breakfast staple—they embody a timeless approach to culinary craftsmanship that mirrors the enduring appeal of classic style. Just as finding your personal style requires understanding foundational principles, mastering the perfect pancake begins with respecting traditional techniques and quality ingredients. This chef’s classic recipe has graced American tables for generations, offering warmth, comfort, and an elegant simplicity that never goes out of fashion.
The beauty of old fashioned pancakes lies in their unpretentious sophistication. Unlike trendy breakfast creations that fade with seasons, these pancakes maintain their relevance through pure excellence. They pair beautifully with vintage-inspired fashion accessories for a charming brunch aesthetic, creating an entire experience that celebrates timeless traditions. Whether you’re hosting an intimate gathering or enjoying a quiet morning, this recipe delivers consistent, magnificent results that prove some things truly are worth preserving.
The Art of Classic Pancake Making
Creating old fashioned pancakes is an art form that demands respect for technique and appreciation for simplicity. Professional chefs understand that the foundation of exceptional pancakes begins with understanding how each ingredient contributes to the final texture and flavor. The traditional approach emphasizes balance—not too much leavening, not too much liquid, just the right amount of mixing to create tender, fluffy results without overdeveloping the gluten.
The history of American pancakes reflects broader culinary trends explored in Style Loom Daily Blog articles about cultural heritage and timeless practices. These pancakes emerged from colonial kitchens, evolved through generations, and remain virtually unchanged because they simply work. Unlike modern fusion recipes that chase novelty, the classic pancake formula has proven its staying power through decades of breakfast tables and diner counters.
Understanding the science behind pancake making elevates your results significantly. When you combine dry ingredients, you’re creating a matrix that will trap air bubbles during cooking. When you add wet ingredients, the liquid activates leavening agents, creating lift and structure. The key is recognizing that overmixing develops gluten, which creates tough pancakes instead of tender ones. This principle remains consistent whether you’re cooking for yourself or mastering types of fashion in your culinary presentation style.
Essential Ingredients and Their Roles
All-Purpose Flour (1½ cups): The structural foundation of your pancakes. All-purpose flour provides the right balance of protein content—enough to create structure without making pancakes tough. Professional bakers measure flour by weight when precision matters most, but spooning and leveling works beautifully for home cooking.
Granulated Sugar (2 tablespoons): Adds subtle sweetness and aids browning through the Maillard reaction. This modest amount respects the flour’s natural flavor while ensuring your pancakes achieve that perfect golden exterior.
Baking Powder (2½ teaspoons): The primary leavening agent that creates lift. Double-acting baking powder activates twice—once when wet ingredients mix in, again during cooking. This ensures consistent rise and fluffy texture.
Baking Soda (½ teaspoon): Works synergistically with baking powder and reacts with acidic components in buttermilk, providing additional lift and promoting browning.
Fine Sea Salt (½ teaspoon): Enhances flavor perception and balances sweetness. Salt is non-negotiable in professional kitchens for this reason.
Buttermilk (1¼ cups): The secret ingredient that creates tenderness and tang. Buttermilk’s acidity reacts with baking soda, creating carbon dioxide bubbles that make pancakes fluffy. If unavailable, create a substitute by adding one tablespoon lemon juice or vinegar to regular milk and letting it sit five minutes.
Egg (1 large): Provides structure, richness, and binding power. The egg yolk contributes moisture and fat, while the white adds lift when properly incorporated.
Unsalted Butter (3 tablespoons, melted): Creates tenderness and rich flavor. Melting the butter before mixing prevents overworking the batter. Always use unsalted butter so you control sodium levels precisely.
These ingredients represent the fashion style of cooking—essential pieces that work together harmoniously without unnecessary embellishment. Just as classic wardrobe staples never disappoint, these fundamental ingredients deliver reliable excellence every single time.
Step-by-Step Instructions
Preparation Phase: Begin by whisking together your dry ingredients in a medium mixing bowl. Combine the all-purpose flour, granulated sugar, baking powder, baking soda, and fine sea salt. Use a whisk to incorporate air and ensure even distribution of leavening agents. This step is crucial because uneven leavening creates inconsistent texture throughout your pancakes.
Wet Ingredients: In a separate bowl, whisk together the buttermilk, egg, and melted butter. Whisk vigorously for about thirty seconds until the mixture is thoroughly combined and slightly frothy. The egg should be fully incorporated, and the melted butter should be evenly distributed.
The Critical Combination: Pour the wet ingredients into the dry ingredients, and here’s where professional technique matters most—fold gently with a rubber spatula until just barely combined. You should see streaks of flour remaining in the batter. This is intentional. Overmixing develops gluten and creates tough, rubbery pancakes. The lumpy batter will smooth out slightly as it rests.
Resting Period: Allow the batter to rest for five minutes. During this time, the flour fully hydrates, the leavening agents activate slightly, and the gluten relaxes. This resting period is absolutely essential for achieving the tender crumb that distinguishes excellent pancakes from mediocre ones.
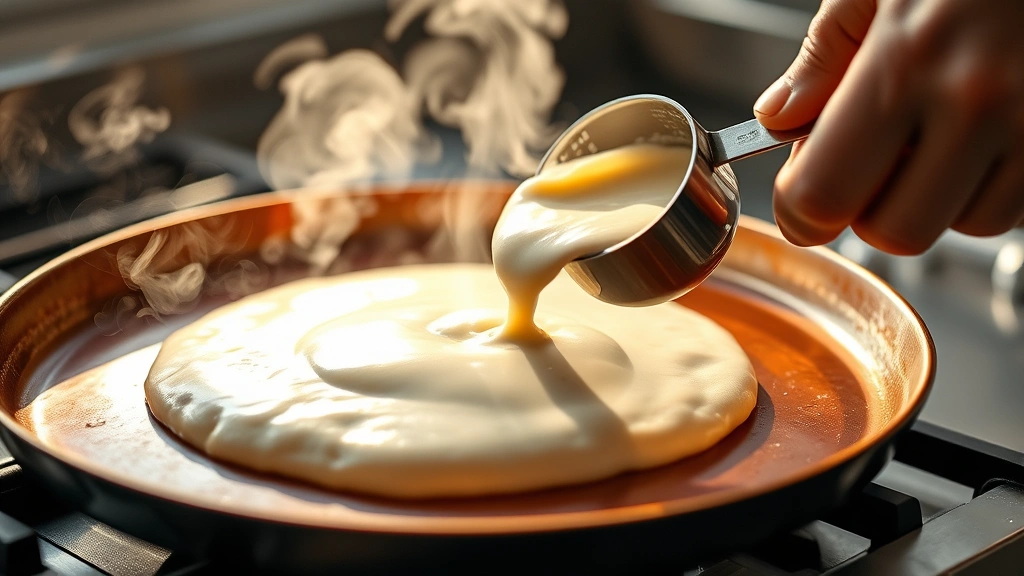
Cooking Process: Heat a griddle or large skillet over medium heat. Lightly butter or oil the cooking surface. The temperature is critical—too hot and the outside burns before the inside cooks; too cool and pancakes become dense. A properly heated griddle should sizzle gently when a drop of water hits it, not violently boil.
Portioning and Cooking: Using a ¼-cup measure or ice cream scoop, pour batter onto the griddle, spacing pancakes three inches apart. Cook until bubbles form on the surface and the edges appear set, approximately two to three minutes. Flip gently and cook for another minute until the bottom achieves a light golden brown. Transfer cooked pancakes to a warm plate.
This methodical approach reflects the principles of fashion accessories—each element serves a purpose, and attention to detail creates superior results.
Pro Tips from Professional Chefs
Temperature Control is Everything: Professional chefs emphasize that pancake success depends almost entirely on proper heat management. Invest in an instant-read thermometer if you’re serious about consistency. The ideal griddle temperature is 375°F (190°C). This specific temperature ensures proper browning while allowing the interior to cook through completely.
Don’t Flip Multiple Times: Resist the urge to flip pancakes repeatedly. Each flip disrupts the cooking process and can create an uneven texture. The single, decisive flip approach used in professional kitchens produces superior results.
Keep Finished Pancakes Warm: As you cook, place finished pancakes on a baking sheet in a 200°F (93°C) oven. This gentle heat keeps them warm without overcooking or drying them out, ensuring all pancakes are served at the same temperature.
Measure Ingredients Precisely: According to Bon Appétit’s culinary standards, weight measurements ensure consistency that volume measurements cannot match. If you own a kitchen scale, use it for flour and sugar. Otherwise, spoon flour into your measuring cup and level with a knife rather than scooping directly from the bag.
Respect the Resting Period: This five-minute window is non-negotiable. It allows the batter to reach equilibrium and the leavening agents to begin their work. Rushing this step compromises your final product.
Use Room Temperature Buttermilk: Cold buttermilk can shock the batter and create lumps that don’t fully incorporate. Remove buttermilk from the refrigerator fifteen minutes before cooking.
Quality Matters: Choose high-quality butter, fresh eggs, and good buttermilk. These foundational ingredients determine your baseline quality. Just as understanding how to find your personal style requires knowing quality pieces, mastering pancakes requires respecting ingredient quality.
Variations and Styling Ideas
Blueberry Pancakes: Gently fold fresh or frozen blueberries into the batter just before cooking. Use frozen berries without thawing to prevent bleeding into the batter. This variation maintains the classic foundation while adding elegant visual appeal and subtle fruit flavor.
Buttermilk Substitute Method: If buttermilk isn’t available, combine one tablespoon fresh lemon juice or white vinegar with regular milk and let sit five minutes. This creates acidity that activates the baking soda, producing nearly identical results to traditional buttermilk.
Whole Wheat Variation: Replace half the all-purpose flour with whole wheat flour for nuttier flavor and additional nutrition. Whole wheat flour absorbs slightly more liquid, so you may need an extra tablespoon of buttermilk.
Cinnamon Sugar Pancakes: Add one teaspoon ground cinnamon to the dry ingredients for warm spice notes. For cinnamon sugar topping, combine two tablespoons granulated sugar with one teaspoon cinnamon and sprinkle over pancakes before flipping.
Presentation and Styling: Channel your inner fashion sense when presenting pancakes. Stack them at slight angles for visual interest, garnish with fresh berries, and drizzle with pure maple syrup in artistic patterns. The way you present food matters as much as how it tastes—this philosophy aligns with types of fashion that emphasize presentation and aesthetic expression.
Serving Suggestions and Presentation
Classic Accompaniments: Pure maple syrup represents the gold standard for pancake topping. The refined sweetness complements the subtle vanilla notes in quality pancakes without overwhelming them. Warm your syrup gently before serving—cold syrup cools hot pancakes too quickly.
Butter Service: Serve with high-quality unsalted butter, cut into pats. The butter will melt naturally on warm pancakes, creating a luxurious texture that cheap margarine cannot replicate.
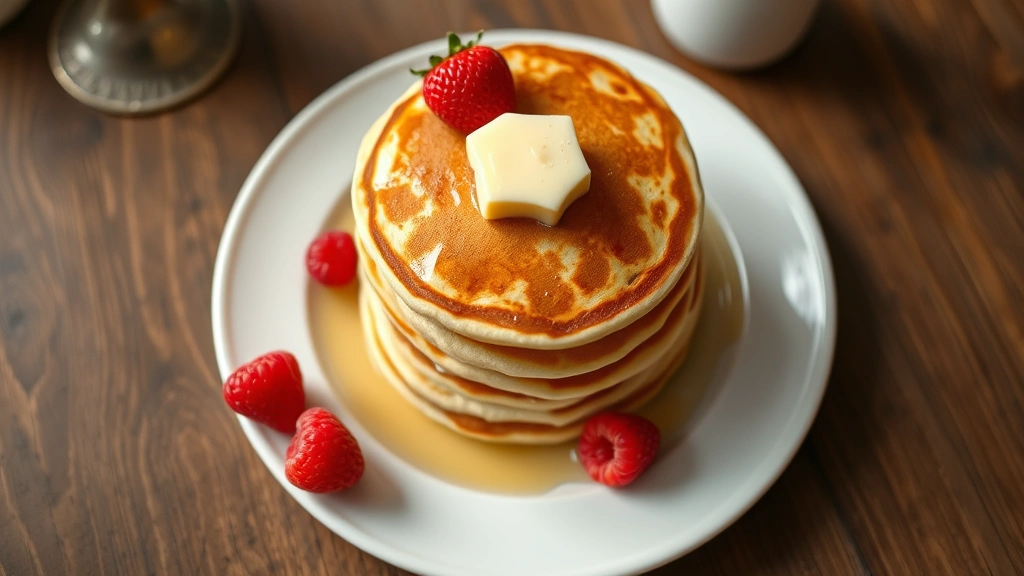
Fresh Fruit Toppings: Fresh strawberries, raspberries, blueberries, or sliced bananas add color, nutrition, and freshness. Arrange fruit thoughtfully for visual appeal—this is your opportunity to express style through food presentation.
Whipped Cream Option: A modest dollop of freshly whipped cream adds elegance and richness. Avoid canned whipped cream in professional settings; the difference in quality is immediately apparent.
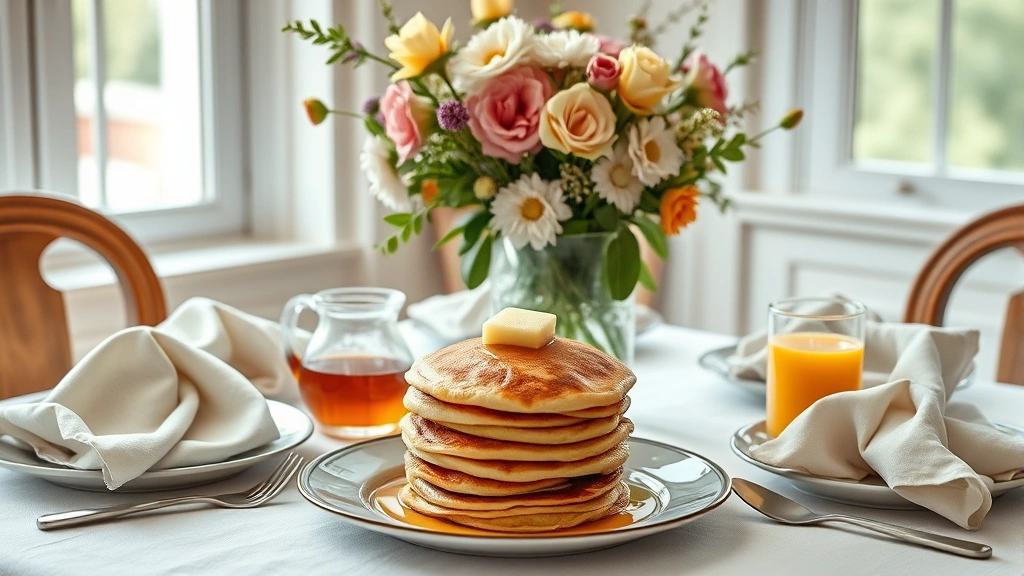
Breakfast Styling Ideas: Create a beautiful brunch spread using vintage linens, quality dishes, and intentional plating. The aesthetic surrounding your meal enhances the eating experience significantly. This principle mirrors how understanding fashion style elevates your entire presence—context and presentation matter enormously.
Beverage Pairing: Serve with fresh-squeezed orange juice, quality coffee, or specialty tea. The beverages you choose communicate sophistication and respect for your guests.
Make-Ahead Strategy: Cooked pancakes freeze beautifully for up to three months. Layer cooled pancakes with parchment paper, wrap tightly, and freeze. Reheat in a 350°F (175°C) oven for ten minutes, restoring texture and warmth without drying them out.
FAQ
Can I prepare pancake batter the night before?
Yes, but with important caveats. Mix dry ingredients the night before and store in an airtight container. Keep wet ingredients separate and combine them just before cooking. Mixing all components ahead of time allows leavening agents to activate prematurely, resulting in flat pancakes. The professional approach always involves combining wet and dry ingredients immediately before cooking.
What causes pancakes to be too dense or rubbery?
Overmixing the batter is the primary culprit. Excessive stirring develops gluten, creating tough texture. Additionally, using expired baking powder or baking soda reduces lift. Always check expiration dates on leavening agents before cooking. Finally, cooking on temperature that’s too low can create dense pancakes that don’t rise properly.
How do I know when to flip pancakes?
Watch for bubbles forming on the surface and the edges appearing dry and set. Typically this takes two to three minutes on a properly heated griddle. Once you see these signs, flip decisively and cook for approximately one minute on the second side until the bottom achieves golden brown color.
Can I use regular milk instead of buttermilk?
Regular milk produces adequate results, but buttermilk creates superior tenderness through its acidity. If you must use regular milk, add one tablespoon lemon juice or vinegar per cup of milk and let sit five minutes before using. This creates a reasonable buttermilk substitute that approximates the original recipe’s chemistry.
What’s the ideal pancake thickness?
Professional chefs aim for pancakes approximately ½-inch thick. This thickness allows proper cooking through while maintaining fluffy texture. If your pancakes are too thin, reduce the amount of liquid slightly or use slightly less batter per pancake. If too thick, add a tablespoon of buttermilk to the batter.
Should I use a non-stick pan or griddle?
Either works beautifully with proper temperature control. Non-stick surfaces require less butter and reduce sticking, making them ideal for beginners. Cast iron griddles develop seasoning over time and distribute heat evenly, preferred by experienced cooks. The key is ensuring even heat distribution and proper temperature regardless of equipment choice.
How can I make pancakes more fluffy?
Ensure your baking powder and baking soda haven’t expired—expired leavening agents cannot create proper lift. Don’t overmix the batter; lumpy batter produces fluffier pancakes than smooth batter. Allow batter to rest five minutes before cooking. Finally, avoid pressing down on pancakes while cooking; let them cook undisturbed for maximum rise.
Can I add vanilla extract to the batter?
Absolutely. Adding ½ teaspoon vanilla extract to the wet ingredients adds subtle complexity without overpowering the classic pancake flavor. This optional addition is popular in professional kitchens and perfectly complements the traditional recipe.